A Plywood Workshop Step Stool
- Hands on
- 150 min
- Start to finish
- 5 hours
- Level
- easy
- Makes
- one 450mm workshop step stool
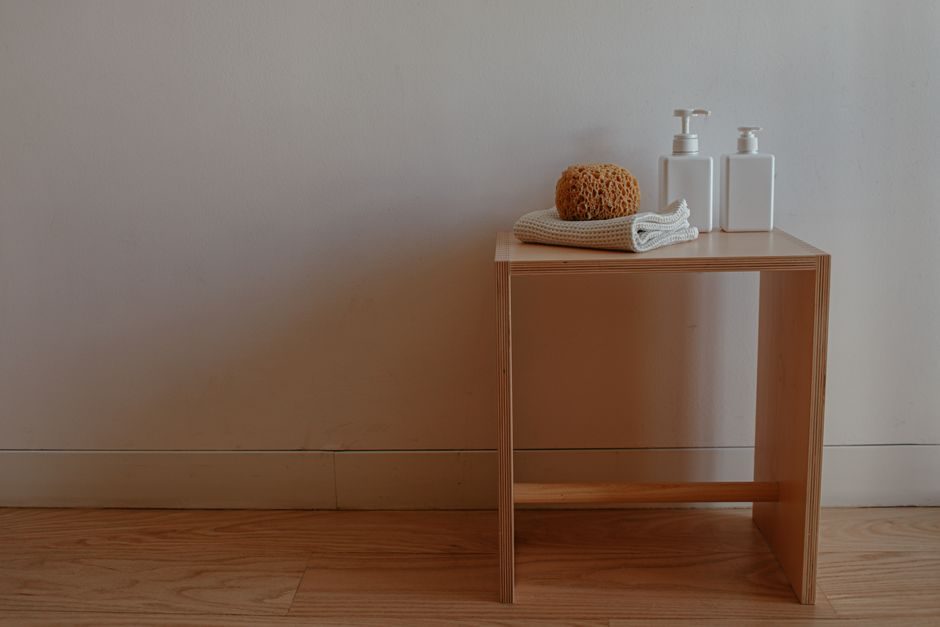
A workshop step stool earns its place twice: you stand on it to reach the top shelf and sit on it while working at a low bench. This one is 450mm tall, 380mm wide and 300mm deep — made from four pieces cut from a single 1200 × 600mm offcut of 18mm birch-faced plywood. The joint throughout is a glued butt joint with counterbored screws, holes plugged or filled before finishing. There is nothing here that needs a mortise, a dowel, or a router. If you can make a straight cut and drive a screw, this is a morning's work.
What you need
Step by step
-
Mark all four panels on the plywood before making a single cut: two sides at 432 × 300mm, one top at 380 × 300mm, and one bottom rail at 344 × 100mm. Lay the two side panels side by side across the 600mm width of the sheet — together they use 600mm across and 432mm along the length, leaving a strip of 600 × 768mm for the top and rail. Score each cut line with a marking knife and straightedge to prevent spelching on the face veneer.
20 min -
Rip and crosscut the four panels. Support the sheet at both ends so it cannot droop and bind the blade. Once cut, clean up all four sawn edges: one pass of a sharp block plane removes end-grain fuzz in a stroke. Sand any rough long-grain edges with 80-grit wrapped around a flat block.
20 min -
Mark the screw positions before drilling. On the top panel, mark three holes per long edge, positioned 15mm in from the edge and evenly spaced along the 300mm depth at 75mm, 150mm, and 225mm — six holes in total, which will drive down into the top edges of the side panels. On each side panel, mark two holes for the bottom rail, centres 130mm up from the bottom edge (this lands at the midpoint of the rail when it sits 80mm from the floor). Drill pilot holes with a 3mm bit, then countersink each so the screw head will sit 4mm below the surface.
15 min -
Dry-fit everything before any glue goes on. Stand the two side panels upright, rest the top on them, and seat the rail between the sides with its bottom edge 80mm from the floor. Check the assembly sits flat and that the diagonals measured across the top face are equal — unequal diagonals mean the frame is racking. Push gently on the long diagonal to correct it, then mark the rail position on the sides with a pencil.
10 min -
Glue and screw the bottom rail first. Run a bead of PVA along both short ends of the rail, seat it between the sides at the pencil marks, and drive the four screws through the sides into the rail ends. Check for square across the opening once the screws are home. Set this sub-assembly aside for fifteen minutes to firm up.
15 min -
Fit the top. Spread PVA evenly across the top edge of both side panels, set the top panel on — centred side to side, flush at the front and back — and drive the six screws down through the top into the side panel tops. Wipe off any glue squeeze-out with a damp cloth before it skins. Check the stool sits flat on a level surface.
15 min -
When the glue has cured — one hour minimum, overnight to be sure — fill or plug all ten countersink holes. Leave filler slightly proud, sand flush once dry. Work through 80-grit, then 120-grit, then 180-grit across the whole surface. Ease all sharp arrises lightly with 120-grit: they chip the finish and catch fingers if left square.
25 min -
Apply two coats of water-based floor varnish or hardwax oil. The first coat raises the grain — let it dry fully, then denib with 240-grit or a grey scuff pad before the second. Let the second coat cure before putting any weight on the stool.
20 min
Afterwards
The finish will protect the ply from light grime but not from standing water: keep the stool off wet floors or it will delaminate at the base edges. Check the screw joints once a year and re-drive any that have backed out. If the stool wobbles after a while, plane or sand back the low foot — mark which corner rocks by placing it on a flat surface and scribing round the base. The finish can be refreshed with a light scuff and a single top coat whenever the surface looks worn.
Questions
Can I use softwood ply instead of birch?
Yes. Softwood ply is cheaper, but the face veneer dents more easily and the edge voids need filling before finishing. Entirely fine for a workshop stool where cost matters more than appearance.
What if I do not own a table saw?
A circular saw with a clamped timber batten as a fence handles all four cuts here. Clamp the batten so the saw shoe runs along it and the cut will be as straight as any table saw. No other machine is needed.
The stool wobbles — what do I do?
Stand it on a reliably flat surface and identify which foot is high. Plane or sand back that foot with a few strokes of a block plane, checking frequently. It rarely takes more than a millimetre of correction.
Can I make it taller to use as a sitting stool at a workbench?
A standard bench sits at 850–900mm. For comfortable perching you want a seat around 650mm. Change the side panels from 432mm to 632mm and the build is identical — only the offcut size changes.