A Birch Plywood Advent Calendar with Twenty-Four Drawers
- Hands on
- 660 min
- Start to finish
- 2 days
- Level
- involved
- Makes
- one case with 24 numbered drawers
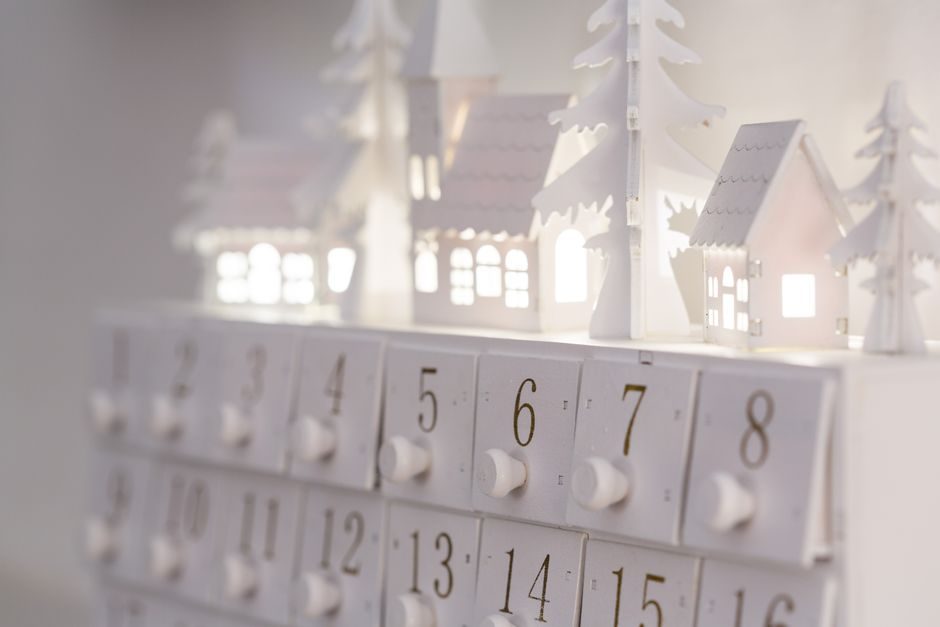
Treat this as a carcass first and a set of drawers second, and the scale stops feeling daunting. The case is a plywood box holding five fixed shelves; between each pair of shelves, three thin dividers split the row into four columns, giving twenty-four identical openings. Every drawer is the same small glued box with an applied front, so once the first one fits, the rest are repetition rather than new decisions. Spread the glue-ups and the finish cure across a weekend's evenings rather than rushing them in one sitting.
What you need
Step by step
-
From the 12mm plywood, cut the two sides at 510 x 114mm and the top and bottom at 402 x 114mm, crosscutting against a stop block clamped to the saw fence.
30 min -
Mark the five shelf positions on the inside face of each side panel, 80mm apart, and rout a 6mm-wide, 6mm-deep housing dado at each mark, guiding the router against a straightedge clamped square across the panel.
45 min -
From the 6mm plywood, cut the five shelves to 378 x 114mm and test-fit each into its housing; they should slide in snugly without forcing.
25 min -
Glue the shelves into the housings in both side panels, check the assembly square by measuring both diagonals, and clamp until the glue has gone off.
30 min -
Cut eighteen vertical dividers at 80 x 114mm from the 6mm plywood, and sand the one long edge that will show at the front of the case.
35 min -
Cut a spacer block exactly 90mm wide and use it to space and glue three dividers evenly into each of the six rows, toe-pinning each one into the shelf above and below once the glue has started to grab.
70 min -
Glue and clamp the top and bottom onto the shelf-and-divider assembly to close the carcass, checking it square before the glue sets.
30 min -
Cut the back panel at 402 x 534mm from the 6mm plywood and pin it to the rear edges of the carcass, keeping it square to the sides as the pins go in.
20 min -
Cut the plywood parts for the twenty-four drawer boxes — two sides at 100 x 74mm and one back at 84 x 74mm each — working through all the sides before resetting the saw for the backs.
90 min -
Cut twenty-four drawer bottoms at 84 x 100mm from the 3mm plywood, then glue and pin each drawer box together, keeping the bottom square to the sides.
70 min -
Cut twenty-four drawer fronts at 94 x 84mm from the 12mm plywood, test each in its opening, and glue it to the open front edge of its matching drawer box with an even reveal all round.
70 min -
Sand every drawer box and the front face of the case to 180 grit, easing all the edges a drawer will pass over so it moves freely.
45 min -
Drill and glue a knob to each drawer front, centred and positioned low enough that a finger tucked underneath can still pull the drawer open.
40 min -
Paint or finish the case and all drawer fronts, giving the inside of the case at least one coat too, so humidity swings don't cup the shelves later.
40 min -
Once the finish has fully cured, number the drawers 1 to 24 with stencils or vinyl numbers, working out your sequence before you start sticking.
30 min -
Fit the drawers into their compartments, easing open any that bind with a few strokes of sandpaper on the runners rather than forcing them.
20 min
Afterwards
Vacuum sawdust out of each compartment and drawer before fitting fronts — grit left in a housing is what makes a snug drawer bind later. Let paint or varnish on the fronts cure fully, at least 24 hours for a water-based product, before the drawers go into daily use through December. If a drawer still sticks once everything is dry, rub the runners with a candle stub or a little paste wax rather than sanding more material away.
Questions
Do the drawers need metal runners?
No. At this size a sanded plywood box sliding in a plywood housing is enough. Aim for about 3mm clearance on each side and it will run freely without rattling.
What if my shelf spacing drifts by a millimetre or two while gluing up?
It won't show. Build each drawer front to fit its own opening rather than to one fixed size, and small variations between rows disappear once the fronts are on.
Can I reuse the case next year?
Yes — leave the drawers empty and the numbers on, and simply refill it each November. A varnished finish will survive being handled once a year for many years.
Is birch plywood necessary, or will cheaper construction ply do?
Construction-grade plywood will hold together fine. Birch just gives a cleaner edge and a smoother surface for paint, which matters more here than strength.