A Shop-Made Drill Press Table With a Sliding Fence
- Hands on
- 235 min
- Start to finish
- 5 hours
- Level
- moderate
- Makes
- one auxiliary table for a bench-top or floor-standing drill press
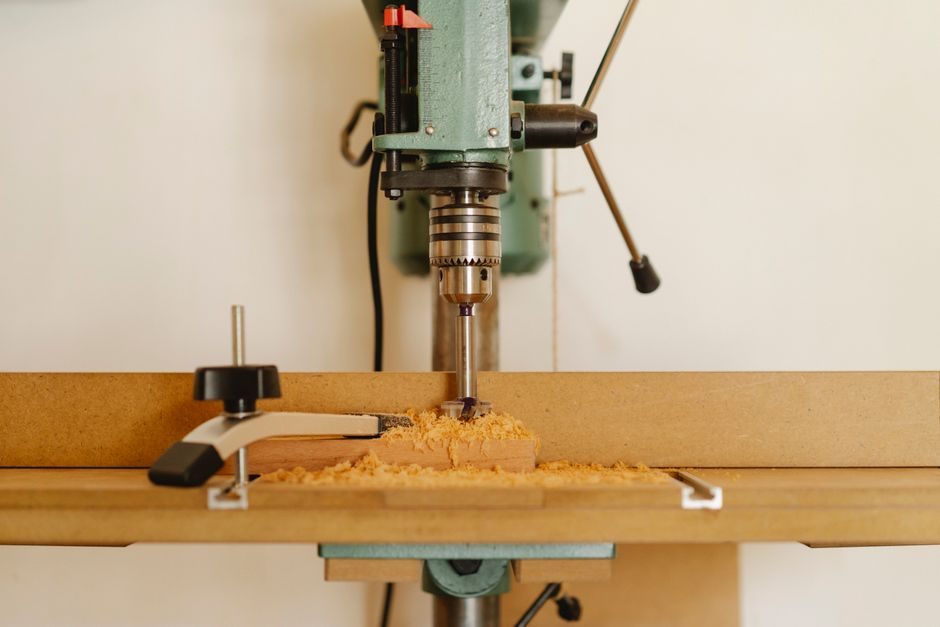
A factory drill press table is small, metal, and gives you nothing to register work against. This auxiliary table clamps on top of it: a flat MDF platen with a fence that slides on T-track and locks square to the bit at any distance from it, and a loose insert in the middle that takes the wear from through-holes instead of the table itself. It all comes from one offcut of 18mm MDF and a short length of T-track, and none of it is permanent — unclamp it and the drill press is back to standard.
What you need
Step by step
-
Cut the table top to 500 x 450mm from the MDF offcut, and square up all four edges.
20 min -
Mark a 150 x 150mm square in the middle of the top, drill a 10mm starter hole inside one corner, and cut it out with a jigsaw, keeping the cut-out piece whole.
20 min -
Plane or sand a whisker off two adjoining edges of the cut-out piece so it drops back into the opening without binding — this becomes the insert.
15 min -
Cut two 420mm cleats from the softwood batten, then glue and screw them to the underside of the top, set back just far enough that the insert sits flush with the top face when it rests on them.
20 min -
Mark two lines 420mm long, running front to back, 130mm either side of the table's centreline, for the T-track grooves.
10 min -
Clamp a straightedge along each marked line in turn, and rout the groove to the width and depth of the T-track in two or three shallow passes, feeding the router against the direction the bit spins.
40 min -
Press the T-track into the two grooves, flush with the surface, gluing it in if the fit is loose.
15 min -
Cut the fence face and base flange to 500mm length, glue and screw them into an L, and check the angle with a combination square.
25 min -
Drill two clearance holes through the fence's base flange spaced to match the T-track, drop the T-track bolts into the tracks through the holes, then fit washers and wing knobs and check the fence slides freely and locks square.
20 min -
Drill a dust-port hole through the fence face sized to your own vacuum hose, and ease its edges with sandpaper.
15 min -
Ease every sharp edge on the table and fence, then seal the cut MDF edges with sanding sealer or diluted PVA.
20 min -
Set the table on the drill press's own platen, bring a bit down by hand to check it lines up over the insert, then clamp the whole assembly down front and back.
15 min
Afterwards
Vacuum the MDF dust rather than brushing it — it's fine enough to be worth not breathing. Let the sealer on the cut edges dry fully before the table sees any use, since damp MDF swells and stops the insert sitting flush. After the first few sessions, check the fence is still locking square to the bit — a hand-tightened wing knob can creep — and swap the insert for a fresh offcut once the hole in the middle grows too large to support the work.
Questions
What size T-track should I use?
19mm (3/4in) aluminium T-track is the common size, and it matches the M6 track bolts and wing knobs sold alongside it in most hardware shops.
Can I use plywood instead of MDF?
Yes. Birch ply holds screws better and survives knocks at the edges, though MDF gives a flatter, cheaper top if the table mostly stays put.
How often does the insert need replacing?
Only once the hole in the middle has grown too wide to back up the workpiece. Since it's a loose drop-in, swapping it for a fresh offcut is a five-minute job.
Why not bolt the table straight to the drill press's own platen?
Clamping keeps the build reversible and avoids drilling into a machine part you might want standard again. Clamped down front and back, it doesn't move in use.