A Pair of Regulation Cornhole Boards
- Hands on
- 275 min
- Start to finish
- 10 hours
- Level
- moderate
- Makes
- a matched pair of regulation-size cornhole boards
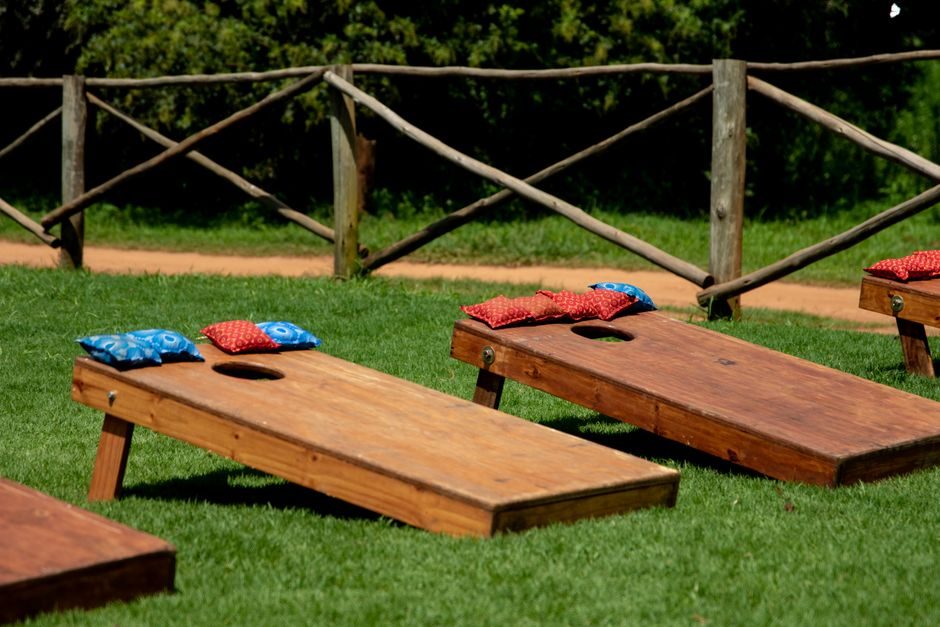
Cornhole is two identical boards and very little else: a flat panel, a six-inch hole set a fixed distance from one end, and legs that lift that end to a set height so thrown bags run true rather than stopping short. Built to the regulation 1220 x 610mm size the game plays properly and the pair stacks flat for storage. The frame underneath does the real work, keeping a thin plywood top flat under repeated bag strikes without adding much weight to carry out to the yard.
What you need
Step by step
-
Check both plywood panels are square and true at 1220 x 610mm. Most sheet merchants cut this as a standard half-sheet, so you are mostly confirming rather than cutting to size.
15 min -
From the 70 x 35mm stock, cut four long rails to 1220mm and six cross rails to 540mm — two long rails and three cross pieces for each board.
25 min -
On one face of each panel, mark the hole centre 230mm in from one short edge and 305mm in from each side.
10 min -
Drill a 10mm starter hole just inside the marked circle on each panel, enough to get a jigsaw blade through.
10 min -
Cut the scoring holes with the jigsaw, following the line at a steady pace. This is the operation covered in the safety note above.
25 min -
Sand both hole edges and the top faces smooth, working up to 180 grit so a bag won't catch on a rough edge.
25 min -
Glue and screw each pair of long and cross rails into a 1220 x 540mm frame, checking it square with a combination square before the glue sets.
35 min -
Screw a centre cross brace into each frame at the 610mm midpoint, so the middle of the panel has support and won't develop a permanent dip under play.
15 min -
Glue and screw each plywood top to its frame, with the hole positioned over the end where the legs will raise the board, screws spaced at roughly 150mm into the rails beneath.
30 min -
Cut four legs to 260mm from the 34 x 34mm stock, with a shallow angle on one end so each sits flush against the underside of the frame.
15 min -
Offer each pair of legs up to the underside near the hole end, check that end stands around 300mm off the ground with the board sitting level, then glue and screw them in place.
30 min -
Fill the screw heads, sand the whole assembly smooth, then finish: stain or paint the frame and underside, and give the playing surface two or three coats of exterior varnish so bags slide cleanly.
40 min
Afterwards
Vacuum plywood dust rather than brushing it — it's fine enough to irritate airways, and the glue in the ply is one more reason not to breathe it. Let a painted or stained frame dry fully before handling, and leave the varnished playing surface a full 24 hours between coats and at least 48 hours after the last one before the boards are stacked, stored, or played on, so the surface doesn't tack up or mark under a thrown bag.
Questions
Why does the hole end need to be so much higher than the other?
The slope is what carries bags toward the hole instead of letting them stop short. At the regulation 300mm rise over a 1220mm length that's a shallow enough angle that a bag landing just short still has a chance to slide in.
Can I cut both boards from a single full sheet instead of two half-sheets?
Yes — a 2440 x 1220mm sheet gives two boards with very little waste and costs less than two half-sheets, but you'll need to break it down with a circular saw and a clamped straightedge before either panel is a manageable size to work on a bench.
Does the frame really need a centre brace?
At 12mm thick, the plywood will flex under a thrown bag without one, and a season of that flex sets as a permanent dip. The brace costs one offcut and about fifteen minutes.
What finish holds up best if the boards live outside?
A marine or yacht-grade exterior varnish on the playing surface resists the UV and damp that would otherwise cloud or lift a standard finish, and it keeps the slide smooth from one season to the next.